
It is becoming harder and harder to post this summer! This tutorial has been a long time in the making or at least a long time in the planning aspect, but life happens and it has been postponed numerous times. This dress only took about one hour to make!  My model will do anything for a M&M...even smile when she is not in the mood!
 My model will do anything for a M&M...even smile when she is not in the mood!
 1. Measure 2 pieces at 23 inches x 19 inches and 2 pieces of a complimentary fabric 23 inches x 6 inches.
 2. Fold the 23 x 6 inches fabric in half (hotdog fold) and press with an iron.
 3. Pin the complimentary fabric to the bottom and the front of the large fabric and stitch together.
 4. Press along the seam.
 5. Fold the 2 pieces in half and cut an opening for the armhole as seen above.
 6. Pin the sides together, such that the front portion are facing each other) from the armhole to the bottom and stitch together.
 7. Fold the armhole over 1/4 of an inch and press with the iron. Note it is pinned in the picture above to hold it prior to pressing.
 8. Fold the armhole over another 1/4 of an inch and pin. Then stitch along the fold.
  9. Fold another 1/4 of an inch along the top of the dress and press with the iron.
 10. Then fold the top of the dress again so that it is about an 1 inch fold and press with the iron.
 11. Stitch the top along the bottom of the fold.
 Once all the sewing is finished, it should look like this.
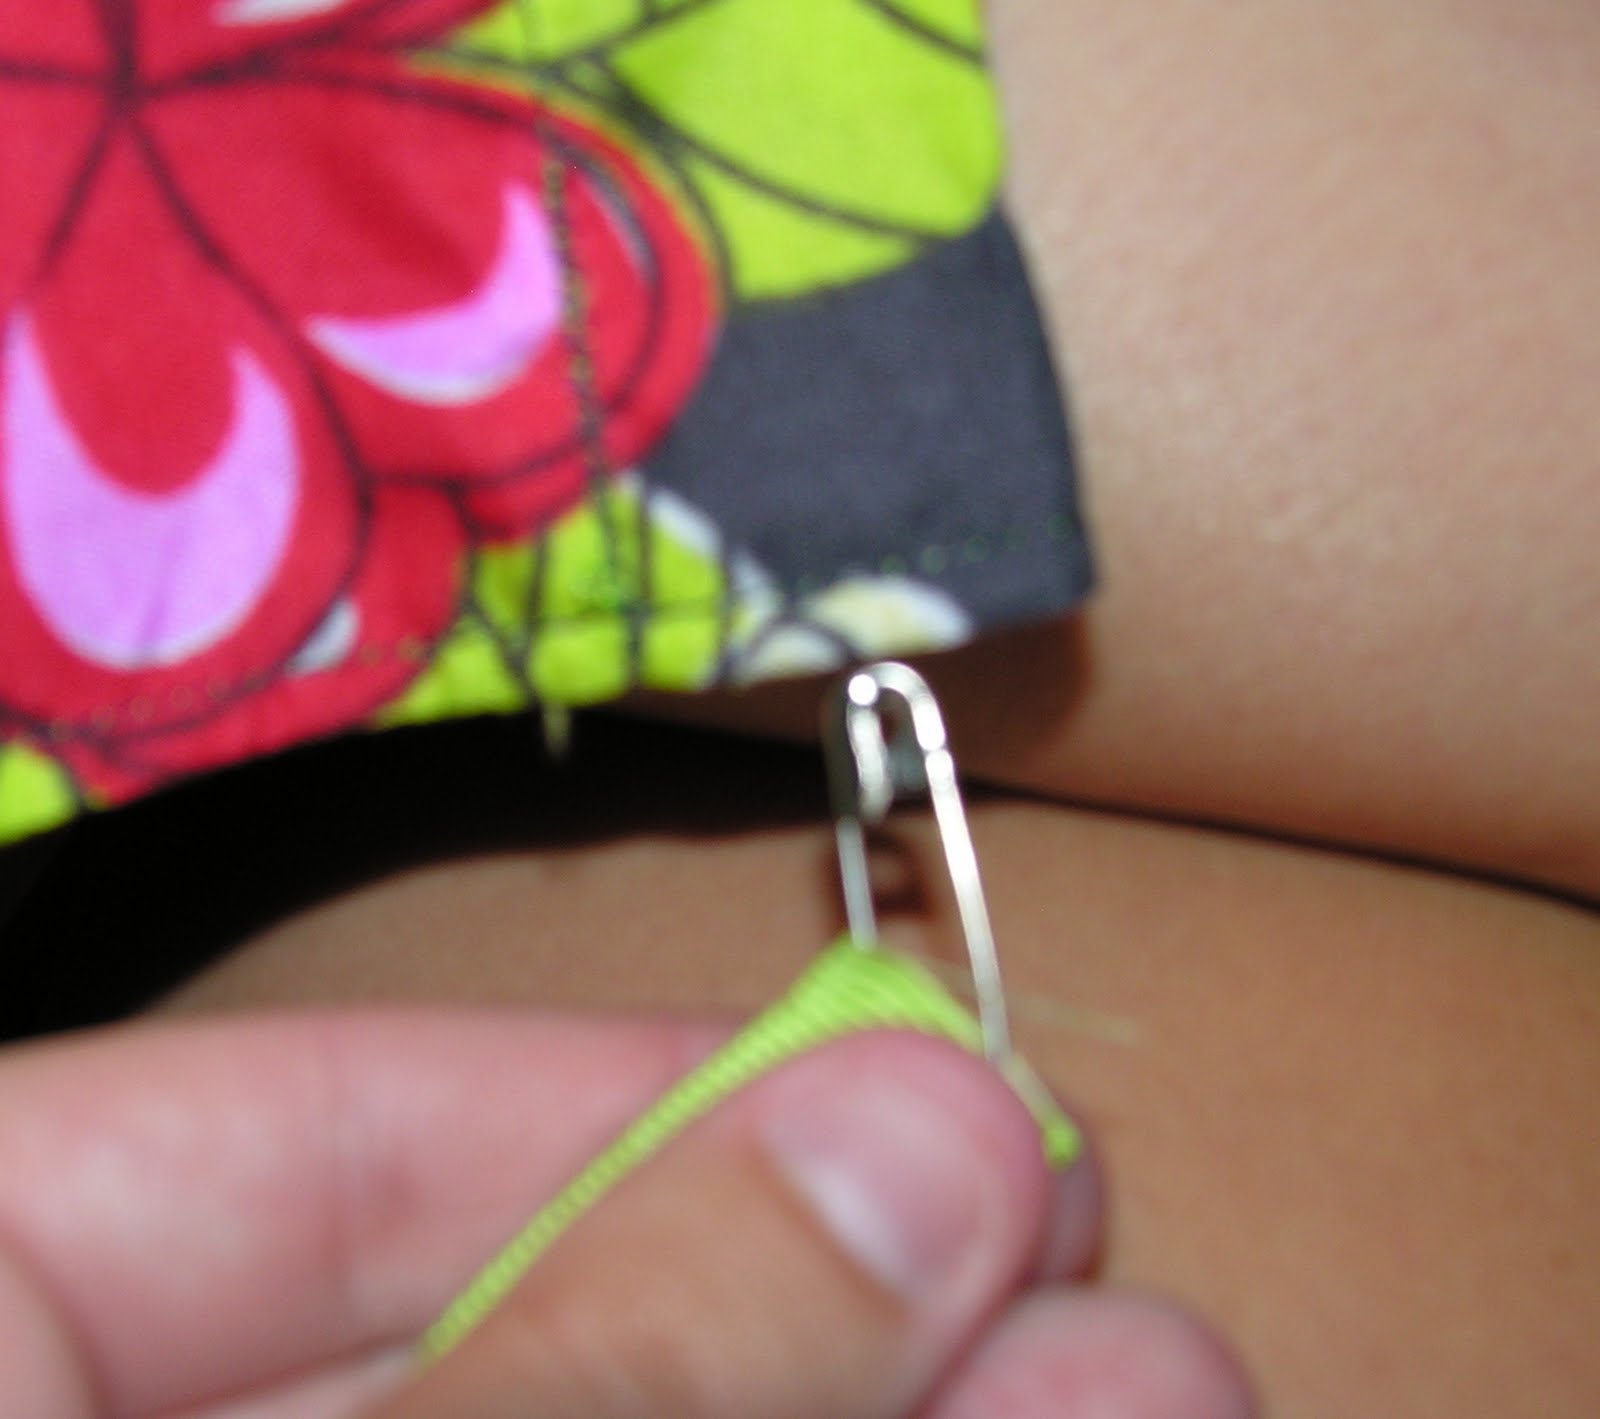 12. The final step is to put a safety pin on the end of ribbon you would like to use and push it through the opening. I used 46 inches of a 5/8" ribbon for this dress.

my MIL and i are going to try this out soon!
ReplyDeleteyou know how much i want to learn to make these. thanks, girl! ;-)
She is becoming quite the little model these days ;) Can't wait to see you next week!!!!
ReplyDelete